Legacy Slideshow
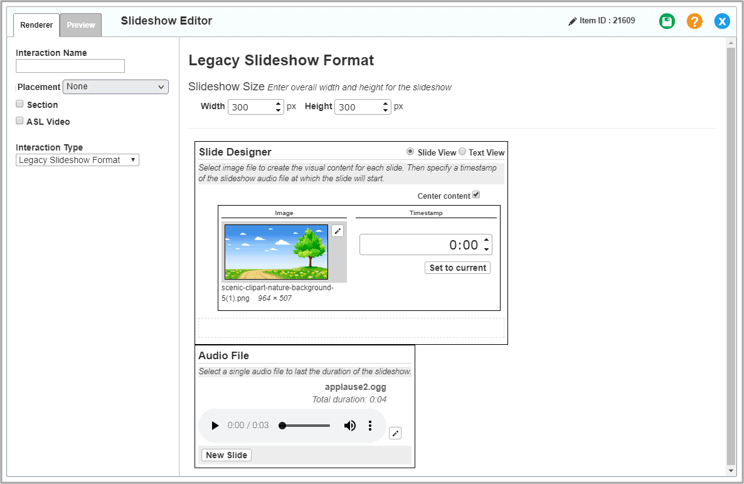
The Renderer tab for slideshows in Legacy format allows you to select the slides and audio file to include in the slideshow. You can specify the timestamp when each slide appears in the audio file.
Figure 26: Slideshow Interaction Editor Window: Legacy Slideshow Format: Renderer Tab
To complete the Renderer tab for a Slideshow element in Legacy format:
1.In the Configuration panel, select Legacy Slideshow Format from the Interaction Type drop-down list.
2.Optional: To specify the size of the slideshow, enter the dimensions (in pixels) in the Width and Height fields.
3.To add the audio file, do the following:
a.In the Audio Files section, click ![]() .
.
b.In the Media Upload: Audio window, click Browse Server and select the audio file you want from the CKFinder window that appears.
- If the file is not available in this window, click Upload and select the file from your computer. When uploading audio files in the CKFinder window, make sure the Audio folder is selected in the panel on the left.
c.Click Generate Files. An OGG and an M4A file appear in the Converted Audio Files section of the Media Upload: Audio window. Note that you must generate an OGG and an M4A file for each audio file that you add in IAT. For more information, refer to Inserting Audio.
d.Optional: In the Caption Track tab of the Media Upload: Audio window, upload a caption file in WebVTT (.vtt) format by clicking Browse, then double-clicking the file you want in the CKFinder window that appears. When the student plays the slideshow, the captions will float near the bottom of the screen.
- If the file is not available in this window, click Upload and select the file from your computer. When uploading WebVTT files in the CKFinder window, make sure the Track folder is selected in the panel on the left.
e.In the Media Upload: Audio window, click OK.
4.To add slides, do the following:
a.Hover over the bottom of the Slide Designer box and click Add Slide.
b.In the Image Properties window, click Browse Server and double-click the image file you want in the CKFinder window that appears.
- If the file is not available in this window, click Upload and select the file from your computer. When uploading image files in the CKFinder window, make sure the Images folder is selected in the panel on the left.
c.Optional: In the Image Properties window, set the size (in pixels) at which the image will appear.
d.Click OK.
e.To specify the point at which the slide appears in the slideshow, do one of the following:
- In the Timestamp section of the Slide Designer box, use the up and down arrows to set the seconds counter to the point in the audio file where you want the slide to go.
- In the Audio File box, play the selected audio file and press pause at the point where you want the slide to go. Then, click Set to Current in the Slide Designer box to set the timestamp to the current point in the audio file.
f.Repeat steps 4.a–e for each slide you need to add.
5.Optional: To edit an image or audio file, click ![]() next to that file.
next to that file.
6.Optional: To change the order of the slides, hover over a slide, click ![]() in the upper-left corner of the slide, and drag it to the location of your choice.
in the upper-left corner of the slide, and drag it to the location of your choice.
7.Optional: To delete a slide, hover over it and click  in the upper-right corner of the slide.
8.To save the entered content, click ![]() in the upper-right corner. Click OK in the confirmation pop-up that appears.
in the upper-right corner. Click OK in the confirmation pop-up that appears.
You can mark the Text View radio button to display file names in the Slide Designer box instead of images. To display the images again, mark the Slide View radio button.